http://happyretireeskitchen.blogspot.com.au/2014/06/cheese-making-great-beginning.html
Make Mozzarella cheese in 30 minutes, it is achievable. I was fortunate to attend a cheese making course at Green Living Australia in Brisbane with Shannon, thanks to a birthday gift from Matthew and Myrtille, and it was great fun as well as fantastic value for money. Based on the excellent instruction given by Angie, and the recipe and guidance from the GLA Cheese making Kit, just two months later, our first attempt at making Mozzarella cheese in almost 30 minutes is successful.
My recipe instructions that follow will cover a couple of tips I discovered along the way which we incorporated into our second mozzarella cheese making session the following day.
 |
| The lovely Angie our teacher, and I are at the GLA Cheese making course. |
 |
- Four litres of whole milk, don't use ultra-pasteurised milk in cheese making (as a general rule, any full fat milk can be purchased from the supermarket, however purchase containers with different expiry dates, as far into the future as possible, and from different suppliers if possible.)
- 1/8 teaspoon Calcium Chloride, diluted in 1/4 cup non-chlorinated or demineralised water. Calcium Chloride generally improves the rennet coagulation properties of your milk, particularly applicable when using pasteurised milk from the supermarket. This isn't necessary for fresh milk pasteurised yourself and brought down to the temperature needed for cheese making.
- 1 dose Lipase ( your pkt will give details) dissolved in 1/4 cup of non-chlorinated or demineralised water for 20 minutes prior to use (optional for increased flavour in Italian cheeses) This is also not a vegetarian product.
- 1/4 rennet tablet (diluted in 1/4 cup of non-chlorinated or demineralised water.Vegetarian rennet tablets are available from GLA (If using Lipase, rennet will need to be increased to 1/2 tablet as it will counteract the effect of Lipase which causes a softer curd.)
Personally, I had a better result the second time without the addition of Lipase and the extra Rennet.
Equipment needed for cheese making:
Medium pot
Cheese thermometer
Stainless steel slotted spoon
Long bladed stainless steel knife
Large stainless steel or enamel colander
Microwave safe bowl
Rubber gloves
See my previous post here for photos of some of these equipment items I purchased from Green Living Australia
Method:

Another bonus at the end of the process is that you will have up to 4 litres of whey, a precious commodity. It has a lot of minerals. Sally Fallon in her book, Nourishing Traditions, one of my favourite reads on correct Nutrition, uses it in many of her recipes including as a starter culture for lacto-fermented vegetables and fruits, for soaking grains and your porridge, and as a starter for many beverages. The chooks love it as does the garden if diluted. The possibilities are endless.
http://happyretireeskitchen.blogspot.com.au/2014/06/cheese-making-great-beginning.html- Attach the thermometer to the side of your medium stainless steel pot.
- Pour the milk into the stainless steel pot and while stirring, add the Calcium Chloride solution.
- Add Lipase, for additional flavour, if you are using it, now, and mix thoroughly.
- Stir in the Citric Acid solution thoroughly and heat the pot to medium.
- Using a low-medium setting, gently heat your milk to 32deg. C. As the milk starts to heat, it will start to curdle, a great sign. Stir gently and slowly while the milk heats through.
 |
| Checking the curds at the cheese class
6. When your milk has reached 32deg C on the thermometer, add the rennet solution and stir very slowly across once and down once, to ensure the rennet is distributed throughout your milk mixture. Don't be tempted to stir more that twice at this stage, or you may not achieve a clean break later. ( This is where I went wrong the first time however the cheesed did still work out in the end.)
7. Remove your pot from the heat and allow the mixture to set for five to ten minutes, or until you have a "clean break.", using your finger or the long stainless steel knife.
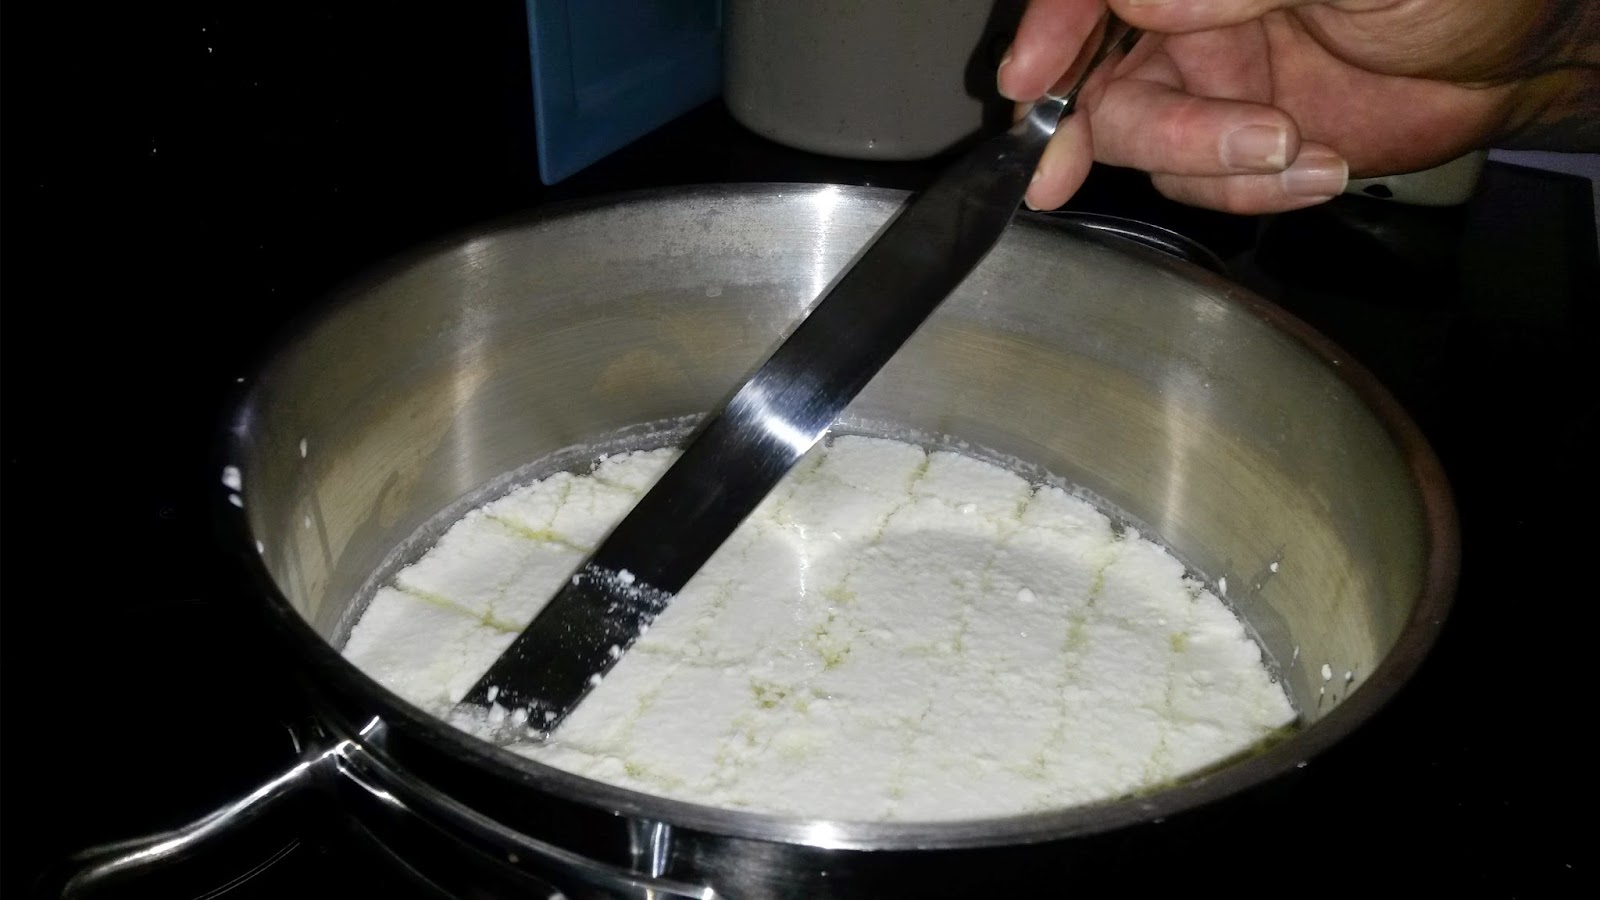
8. Cut the curd using the long bladed stainless steel knife that reaches to the bottom of the pot. Cut the curd into strips about 2cm wide, then do the same across the original cuts. Slant your long knife to at least a 45deg. angle and make cuts on an angle within the confines of the pot, resulting in the curd being cut into evenly sized cubes.
9.This is so exciting. The curds and whey are now separating.
10.Place the pot back onto the stove and heat the curds to 38deg.C to 40deg. C., stirring gently and continuously to keep the curds moving around the pot.
 11.Once the curds have reached 40deg. C, remove the pot from the heat of the stove and stir a few more minutes, to help the curds to further dispel the whey. The longer you stir, the firmer your curds will be. |
To reach the final stage of heating the mixture, to fully separate the whey from the curds, so that you have a mozzarella cheese, the Microwave method is recommended by Green Living Australia.
12. Using your slotted spoon, scoop the curds into a microwavable bowl. Neil and I found it easier to scoop them initially into a colander sitting in a large bowl so that the whey drips through, before transferring the curds to the microwave safe bowl. It is a personal choice.
13. Gently press the remaining curds with your hands, and pour off as much of the excess whey as you can.
14. Microwave the curds on high for one minute and then remove and again press out gently and drain off any additional whey dispelled. The cheese will now start to mass together and become sticky. Gently knead the cheese away from you, as if you are kneading bread. It will become smooth and shiny and form into one piece. This is so fulfilling. Nearly there.
15. Place the curd back into the microwave and heat on high for 30 seconds. Remove and pour off any remaining whey. Knead the cheese like bread again until it begins to cool. Be careful. The cheese will probably be too hot to handle with your bare hands so at this point wear clean gloves.
16. Microwave again for 30 seconds on High. Knead again until the cheese is smooth and shiny, working in the Cheese Salt as you are kneading. When the cheese stretches, you are finished.
Don't be tempted to over knead during the final stage as the cheese may become too firm and rubbery.
Note the cheese will not stretch properly if it is below 58 deg.
Another bonus at the end of the process is that you will have up to 4 litres of whey, a precious commodity. It has a lot of minerals. Sally Fallon in her book, Nourishing Traditions, one of my favourite reads on correct Nutrition, uses it in many of her recipes including as a starter culture for lacto-fermented vegetables and fruits, for soaking grains and your porridge, and as a starter for many beverages. The chooks love it as does the garden if diluted. The possibilities are endless.
To create Bocconcini from your piece of mozzarella, roll your fresh mozzarella into bite sized balls, and store in water or whey, in the fridge.
The staff at Green Living Australia are very helpful. If you decide to give cheese making a try, and have any problems, give them a call on (07) 3808 2576, or email, help@greenlivingaustralia.com.au.
Nice Blog
ReplyDeleteA2 milk in chennai
Your blog page on Happy Retiree's Kitchen is a delightful culinary haven! The collection of recipes and stories exudes a passion for cooking and a zest for life. The diverse range of dishes, from comfort food to gourmet delights, showcases your culinary expertise and creativity. Best Milk In Chennai As a fellow food enthusiast, I find your blog both inspiring and mouthwatering. The personal anecdotes accompanying each recipe add a charming touch, making it a joy to explore. I look forward to trying out some of your recipes and reading more about your culinary adventures. Cheers to a happy retirement filled with delicious moments!
ReplyDelete